What you’ll learn
In this tutorial you’ll learn how to:- Set up your development environment.
- Create a handler function.
- Test your handler locally.
- Create a Dockerfile to package your handler function.
- Build and push your worker image to Docker Hub.
- Deploy your worker to a Serverless endpoint using the Runpod console.
- Send a test request to your endpoint.
Requirements
- You’ve created a Runpod account.
- You’ve installed Python 3.x and Docker on your local machine and configured them for your command line.
Step 1: Create a Python virtual environment
First, set up a virtual environment to manage your project dependencies.1
Create a virtual environment
Run this command in your local terminal:
2
Activate the virtual environment
- macOS/Linux
- Windows
3
Install the Runpod SDK
Step 2: Create a handler function
Create a file namedhandler.py and add the following code:
handler.py
prompt string contained in the input object. You can replace the time.sleep(seconds) call with your own Python code for generating images, text, or running any machine learning workload.
Step 3: Create a test input file
You’ll need to create an input file to properly test your handler locally. Create a file namedtest_input.json and add the following code:
test_input.json
Step 4: Test your handler function locally
Run your handler function to verify that it works correctly:Step 5: Create a Dockerfile
Create a file namedDockerfile with the following content:
Dockerfile
Step 6: Build and push your worker image
Before you can deploy your worker on Runpod Serverless, you need to push it to Docker Hub:1
Build your Docker image
Build your Docker image, specifying the platform for Runpod deployment, replacing
[YOUR_USERNAME] with your Docker username:2
Push the image to your container registry
Step 7: Deploy your worker using the Runpod console
To deploy your worker to a Serverless endpoint:- Go to the Serverless section of the Runpod console.
- Click New Endpoint.
- Click Import from Docker Registry
- In the Container Image field, enter your Docker image URL:
docker.io/yourusername/serverless-test:latest. - Click Next to proceed to endpoint configuration.
- Configure your endpoint settings:
- (Optional) Enter a custom name for your endpoint, or use the randomly generated name.
- Make sure the Endpoint Type is set to Queue.
- Under GPU Configuration, check the box for 16 GB GPUs.
- Leave the rest of the settings at their defaults.
- Click Deploy Endpoint.
Step 8: Test your endpoint
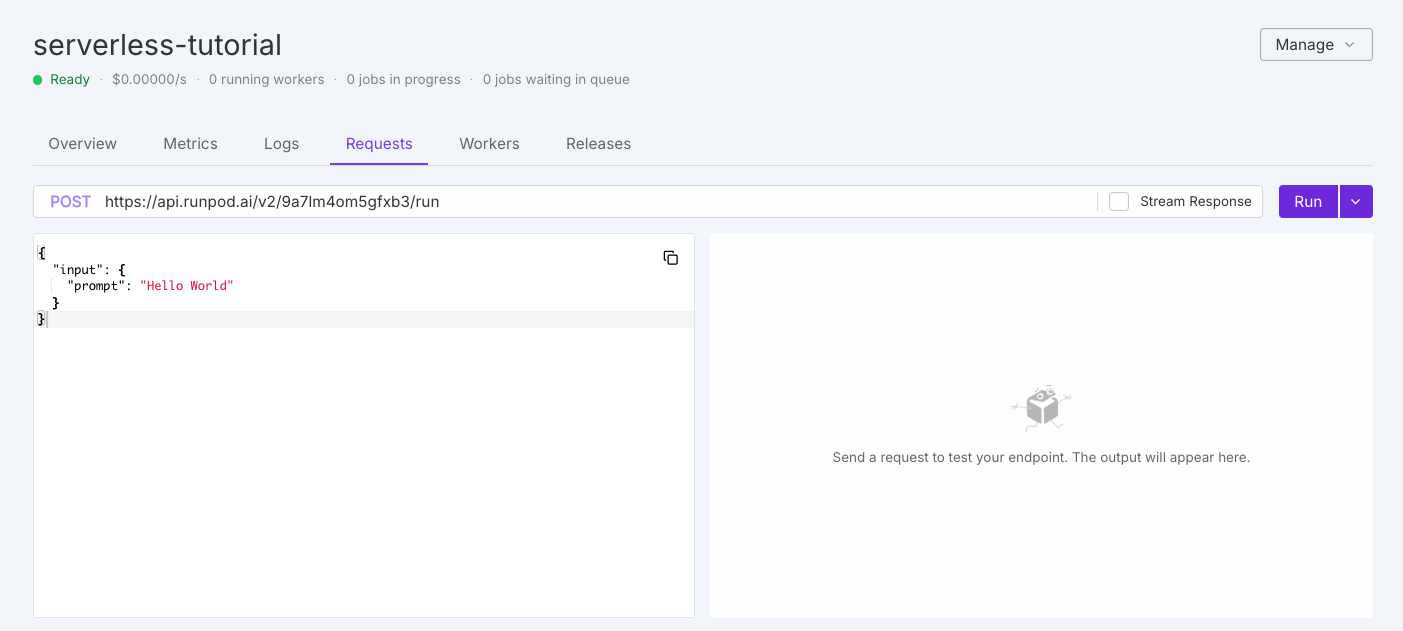
To test your endpoint, click the Requests tab in the endpoint detail page: